
What is Dry Rot
Dry rot often gets brushed off as a minor problem. Many homeowners think it’s just an eyesore or a reason for a squeaky step. In sunny places like Sacramento, it’s easy to overlook a few cracks or fading wood. But dry rot is much more than just a cosmetic flaw. It quietly eats away at wood, and missing those early signs can turn a small issue into a serious risk.
I’ve seen plenty of homes in Roseville and Sacramento where a simple patch of wood rot led to expensive repairs. What starts as a soft spot or a little peeling paint can hide deep, hidden damage. Dry rot weakens the core of your wood, not just the surface. A deck or porch might look solid, but the support underneath could be falling apart. This isn’t just about appearances. It can put your family’s safety at risk and lead to major repair bills. Covering it up with paint or ignoring it never works for long.
Understanding dry rot is important for every homeowner. If you know how to spot the warning signs early, you can prevent bigger problems. In the next sections, you’ll find out what dry rot really is, how it gets started, why it’s so sneaky, and how catching it early can save you money and stress. These tips come from real experience fixing wood in Sacramento’s heat, so you’ll get clear and honest advice you can use right away.
Understanding Dry Rot
Dry rot might sound like a minor nuisance, but it’s actually a destructive fungus that quietly damages wood from the inside. On the surface, wood can look solid and safe. But if you press a screwdriver into a beam or board and it sinks in easily, that’s often a sign of dry rot. The wood turns soft and weak, almost like sponge cake, even if it looks normal at first glance.
The name “dry rot” is confusing. Many people think it happens in dry conditions. In reality, dry rot needs moisture to start growing. The scientific name for this fungus is Serpula lacrymans. It thrives when wood stays damp for a long time. Leaky pipes, poor drainage, or even rainwater can make the perfect environment for dry rot to grow. Once it begins, the fungus sends out thin white threads called hyphae that move through wood and can even cross over brick or stone to find new places to invade.
The real problem is how dry rot destroys the cellulose inside wood. Cellulose is what gives timber its strength. As the fungus feeds on it, the wood becomes brittle and crumbly. Boards, posts, or beams that seem fine may suddenly crack or break under pressure. That’s why dry rot is such a risk to any wooden part of your home. Spotting it early and keeping your wood dry are the best defenses against serious damage.
Dry Rot and Wet Rot Compared
If you’ve ever pulled up a deck board and found crumbly, damaged wood, you might wonder if you’re dealing with dry rot or wet rot. Both are serious problems, but they aren’t the same. Each is caused by a different type of fungus, and the way they spread makes a big difference for repairs and your home’s safety.
Wet rot usually shows up when there’s a clear, ongoing moisture issue. You’ll often see it in places like leaky windowsills or fence posts stuck in wet ground. Wet rot needs constant moisture and tends to stay close to where the wood is soaked. If you fix the water problem and let the area dry out, wet rot usually stops spreading.
Dry rot is much harder to control. It still begins with moisture, but once it starts, it can travel far from the original wet spot. The fungus behind dry rot sends out fine strands called mycelium that move through wood, plaster, or even brick. This lets dry rot appear in places you wouldn’t expect, far from the first sign of trouble. Because it can spread through hidden areas, dry rot often leads to larger, more complicated repairs. Later, we’ll cover why this difference means dry rot needs a different approach, but knowing the type of rot early can save you a lot of time and money.
How Moisture Leads to Dry Rot
Dry rot might sound like a problem that happens without water, but moisture is always the starting point. If you’ve ever lifted a deck board and found soft, crumbly wood, that’s the result of water quietly damaging lumber over time. Even newer decks or homes are at risk if water is allowed to linger and the area stays damp.
Fungus that causes dry rot needs damp wood. Still air, leaks, and poor ventilation create the perfect spot for trouble. Here are some common ways moisture gets into places it shouldn’t:
- Leaky roofs: Even a small drip can keep rafters and beams damp, giving dry rot a foothold.
- Clogged or damaged gutters: Water spills onto siding, window sills, or deck connections, soaking the wood.
- Plumbing leaks: A hidden pipe leak in a wall or crawlspace keeps wood wet long enough for fungus to grow.
- Rising damp: In older homes, moisture can travel up from the ground, especially if there’s no vapor barrier or if wood touches the soil directly.
- Condensation: Poor airflow in bathrooms, laundry rooms, or under decks traps humidity, which settles into wood.
Older houses and decks face more risk from dry rot. Many homes built before the 1980s don’t have the right protection to keep water and air moving. Outdoor wood is exposed to rain, sprinklers, and morning dew, sometimes staying wet for days. If you haven’t looked in those hidden corners or checked the base of your posts recently, now is a good time. Just a little moisture in the wrong place can make strong wood weak in a short period.
The Spread of Dry Rot
Dry rot is more than just a problem for wood. It’s a sneaky fungus with spores that drift through the air, landing almost anywhere. Most of the time, these spores stay harmless. But when they settle on damp wood – such as in a dark deck corner or a hidden crawlspace – they can start to grow. If moisture levels reach about 20% or higher, the spores begin to germinate. That’s when trouble starts.
After dry rot begins, it spreads fast and can be hard to contain. The fungus grows through thin threads called hyphae, which join together and form mycelium. This mycelium acts like a web, moving through wood and even crossing over masonry. It can slip through cracks and move behind walls. Sometimes, dry rot appears far from where the original moisture problem started. For example, you might find dry rot on a deck beam that was dry, but the fungus crept in from a wet planter box nearby.
This ability to travel along wood and through other materials often surprises homeowners. A small leak in a roof can lead to dry rot showing up months later in a completely different spot, like the basement stairs. Because it can move so quietly and quickly, dry rot is difficult to track and even harder to stop if left untreated.
The Lifecycle of Dry Rot
Spore Stage
Dry rot begins with tiny, almost invisible spores. These spores are present almost everywhere – floating in the air, settling on wood, and even clinging to clothing or shoes. On their own, they don’t harm anything. They simply rest on wood, waiting. Once the environment is damp enough and temperatures are mild (usually between 60 and 70°F), the spores start to grow. In many homes, spores can sit for months on timber, waiting for a leak or excess humidity to create the right conditions.
Hyphae and Mycelium
When moisture becomes available, spores develop thin, root-like threads called hyphae. These threads dig into the wood and join together to form mycelium – a soft, cottony web that spreads out in search of more food. Mycelium is usually white or gray, sometimes looking like a thick cobweb. This is when dry rot starts breaking down the cellulose within the wood, making it weak and crumbly. Homeowners might see this fuzzy growth behind baseboards, under decks, or in crawlspaces. It quickly moves through wood and can travel unseen for quite a distance.
Fruiting Bodies and Spread
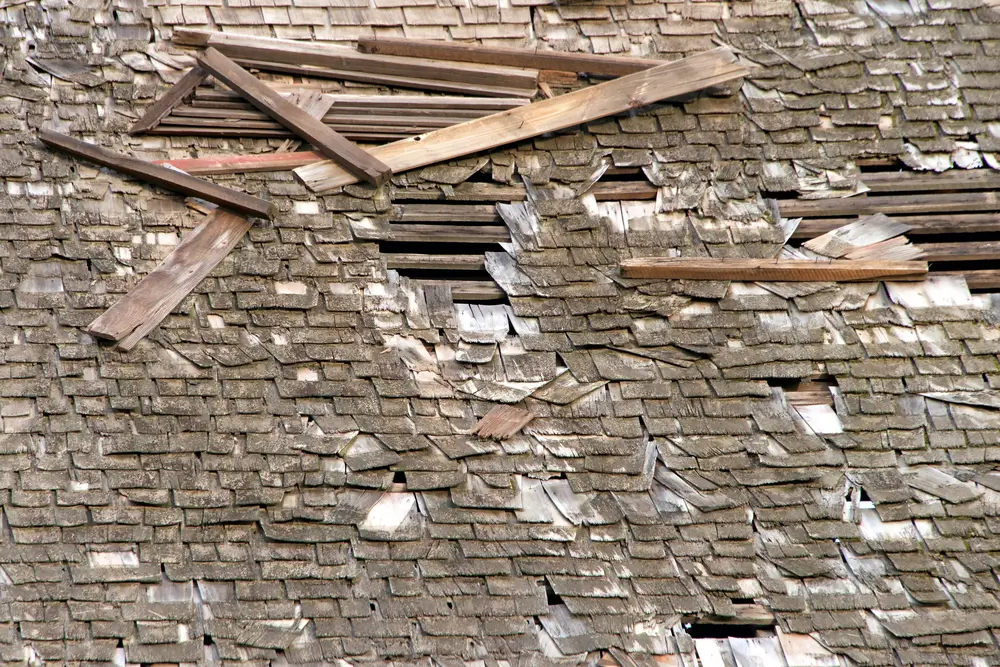
When conditions are right, mycelium produces fruiting bodies. These look like round, mushroom-like lumps, often orange or rust-colored, and can appear on wood or even brick. The fruiting body’s main job is to release new spores. Once this stage is reached, spores spread to other areas, and the cycle begins again wherever moisture is present. Finding fruiting bodies inside your home is a clear sign that dry rot has advanced and professional help is needed to stop further damage.
Spotting the Signs of Dry Rot
Anyone can learn to recognize dry rot with a little observation and the right information. You don’t need to be a wood specialist. Over time, I’ve noticed everything from a faint musty smell in a crawlspace to deck posts breaking apart with barely a touch. The key is to catch the warning signs before the damage spreads. Knowing what to look for can protect your home and lower your repair costs.
Use your senses. Dry rot often starts subtly. Look for cracks or sunken spots in wooden surfaces. Sometimes the paint will bubble or peel without an obvious cause. Press on suspicious areas with a screwdriver. If it feels soft, crumbles, or your tool sinks in, that’s a sign of trouble. One time, a single tap revealed hidden damage that ran the length of a deck joist. Smell is important too. A musty, mushroom-like odor is a classic clue that something is wrong, even if you can’t see visible damage yet.
- Cracks, shrinking, or sunken spots in wood
- Brittle, crumbly, or powdery wood texture
- White, gray, or yellowish cotton wool-like growth (mycelium)
- Orange or rusty-red pancake-shaped growths (fruiting bodies) with possible spore dust
- Peeled or bubbling paint, especially in damp areas
- Musty, earthy, or mushroom scent
If you notice two or more of these signs, especially in places like old decks, window sills, or anywhere moisture collects, take action. Dry rot often hides behind walls or under floors, only becoming obvious when the damage is severe. Many people mistake it for normal aging in wood until something breaks. Rely on your senses and respond quickly if something seems wrong.
Where Dry Rot Hides
Dry rot is rarely easy to spot. It often lurks out of sight, settling into places where moisture and poor airflow create the perfect environment for decay. These hidden areas are usually overlooked during routine home checks, making it easy for the fungus to spread before anyone notices.
Start by checking the exterior. Decks, especially where boards meet the house, are common targets. Support posts, railings, fascia boards, and the lower edges of fences are also at risk. Window sills can look solid but may crumble when probed with a screwdriver. On the inside, dry rot often hides in bathrooms – under tubs or toilets, behind baseboards, or near leaky windows. Crawlspaces and dark, damp corners are frequent trouble spots. Any area where water lingers, like beneath a dripping gutter or near a slow-drying vent, should be on your inspection list.
Older homes and buildings set low to the ground face even greater risk. Their wood is closer to sources of moisture and often receives less ventilation. If you have a deck attached to your house, especially an older one exposed to years of changing weather, inspect it closely. Dry rot will take advantage of any neglected spot where wood stays damp and air can’t circulate.
Decks and Dry Rot Risk
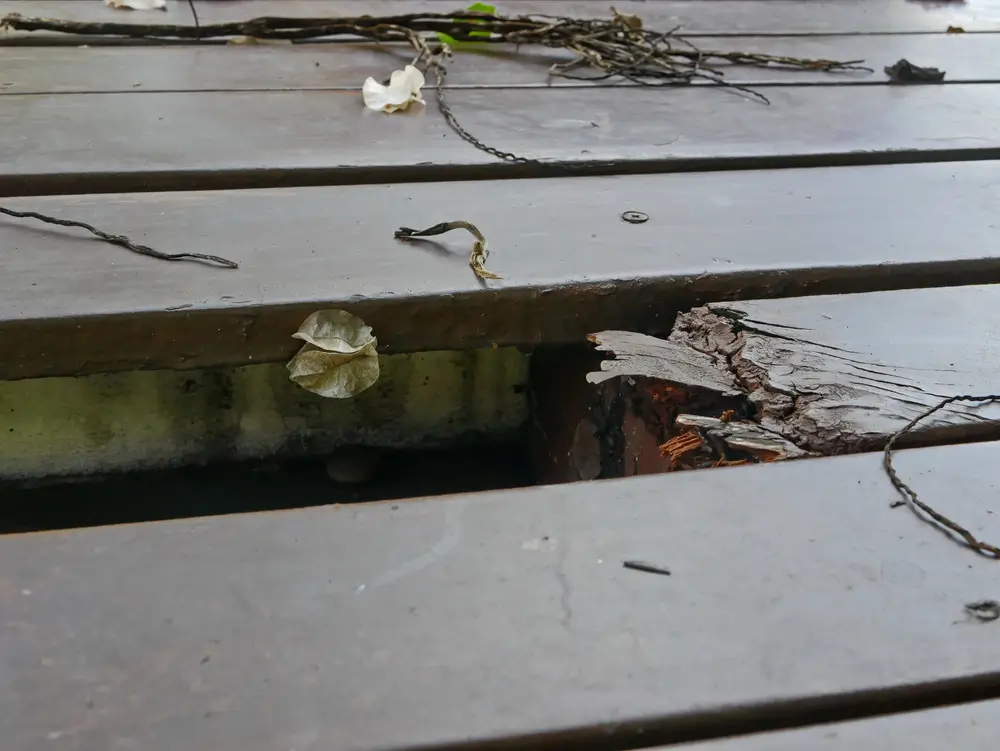
Decks are especially vulnerable to dry rot, especially in regions with wet winters or heavy irrigation. Even decks that look strong and well-built can fall victim. The problem starts small – water collects in hidden spots between boards, under railings, and behind the ledger board where the deck connects to your house. If flashing is missing or gaps are left in the waterproofing, moisture slips in and sticks around. This creates a perfect environment for dry rot to develop and spread.
Small issues can turn into big problems fast. Something as simple as a clogged gutter can direct water onto one section of your deck for months. Decks built too close to the ground often trap moisture because air can’t flow underneath. Piles of leaves that don’t get cleared away hold in dampness. The ledger board is a weak point – if it isn’t installed with care, water sneaks behind it and saturates the framing. Dry rot can start here and move through the wood, sometimes without obvious warning signs. That’s why some homeowners only discover the damage when a board suddenly gives way underfoot or when sections start to sag.
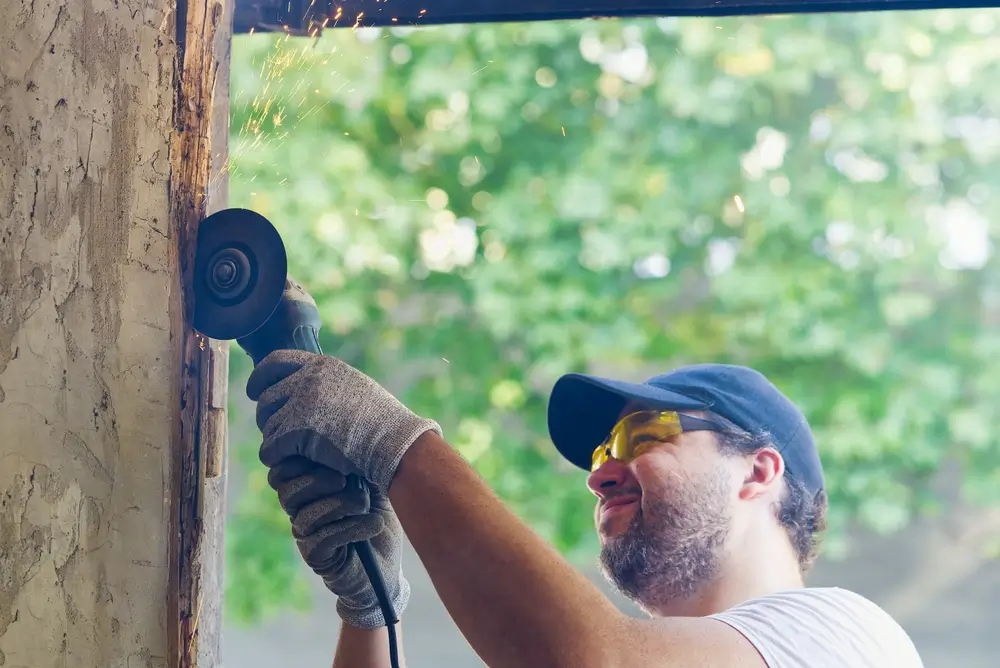
In some situations, dry rot is so advanced that a quick patch isn’t possible. You might hope to swap out a few boards, but a closer look reveals the damage has reached the frame or even the house wall. At that point, a full deck rebuild is often needed. Acting quickly is key. If you suspect dry rot, check out exterior wood rot repair services right away. Early action can save you from a much bigger repair and help protect your home’s safety.
How to Inspect for Dry Rot
Finding dry rot early can save you thousands in repairs and a lot of stress. Many homeowners overlook a small soft spot on a deck, thinking it’s nothing. But weeks or months later, the damage can spread much further than expected. The good news is you don’t need special equipment. A flashlight and a basic screwdriver are enough to start your inspection.
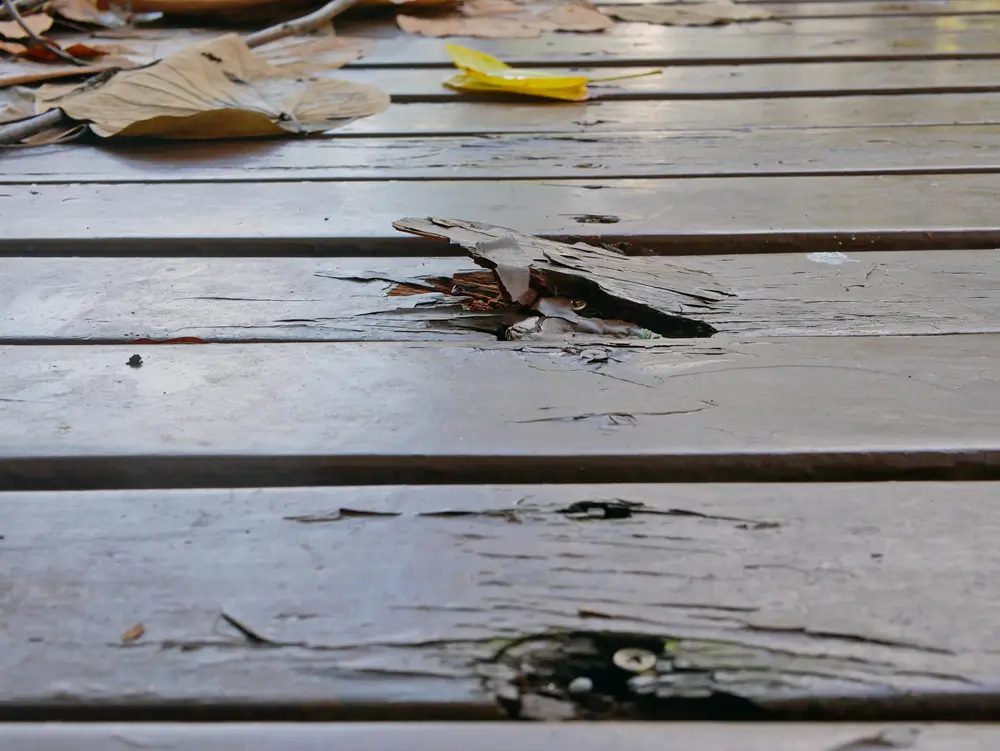
Begin with a close look at all exposed wood. Watch for cracked or sunken areas, peeling paint, or boards that look out of place. Use the screwdriver to gently press into questionable spots. Solid wood should feel firm. If your tool sinks in easily or the wood feels crumbly, there’s a problem. Don’t skip hidden areas either. Check under stair treads, behind planters, near gutters, and anywhere water might collect.
“Push a screwdriver into the wood. If it goes in more than 3-4 mm without much effort, there could be dry rot below the surface.”
Dry rot often hides, but you can watch for these warning signs:
- Wood feels soft, spongy, or breaks apart under light pressure
- Cracks, blocky patterns, or dark stains in the grain
- Paint or sealant bubbling, peeling, or falling off
- Musty or mushroom-like smells in certain areas
- White, gray, or yellow fuzz (mycelium) on or near the wood
If you spot these signs, or your screwdriver goes deep with little resistance, it’s time to get help. DIY checks can catch visible rot, but dry rot often hides behind trim, inside walls, or under floors. When you’re unsure, bring in a professional. Acting quickly can mean fixing a small section instead of replacing the whole structure.
Risks to Health and Home
Dry rot is much more than a surface issue. If you’ve ever stepped onto a deck and felt it sink a little, that’s a warning sign. Under the surface, dry rot eats away at wood until beams, joists, and posts lose their strength. Sometimes, what looks solid from the outside is already falling apart inside. Even a small area of rot can weaken floors or stairs enough to cause them to fail without warning.
Ignoring dry rot allows it to spread further. The longer it goes, the more likely it is that entire sections of your home could become unsafe. The risk isn’t limited to wobbly boards. In severe cases, dry rot can lead to major structural collapse.
The problems don’t stop with wood and nails. Dry rot creates fungus, which spreads spores and a musty smell throughout the house. These spores can irritate the lungs and make breathing harder, especially for children, seniors, or anyone with asthma. Sometimes, health problems like coughing or allergies are made worse by hidden rot behind walls and under floors.
Dry rot also affects your wallet. Homebuyers are quick to walk away or demand a lower price if they see signs of wood rot. Even small patches can lead to expensive repairs or lost value when it comes time to sell. Leaving dry rot untreated can end up costing thousands of dollars in repairs and lost value. Acting early protects both your home and your health.
What to Do When You Find Dry Rot
Discovering dry rot in your home or deck can feel overwhelming, but delaying action will only make things worse. The first step is to stop the source of moisture. Look for leaks in roofs, gutters, plumbing, or any other area that might allow water to soak the wood. If you can, turn off any water supply causing the problem. Make sure the area starts to dry out before anything else.
Avoid quick patches or covering up damage. Dry rot spreads quickly, and ignoring it can lead to major structural problems. Even a small spot may point to hidden damage nearby.
Contact a qualified professional as soon as possible. A specialist can assess the extent of the damage and recommend the right treatment. Acting quickly saves wood, lowers repair costs, and protects your home from further harm. If you see signs of dry rot, take action immediately for peace of mind and a safer home.
Treating Dry Rot
Assessment and Preparation
Start by figuring out exactly where dry rot has taken hold. Look beyond the obvious spots. Dry rot often hides behind trim, under deck boards, or inside wall cavities. If you notice wood that feels weak or smells musty, investigate further. Open up questionable areas. Check nearby brick or concrete too, since the fungus can spread into these materials. A careful inspection is key before moving forward with repairs.
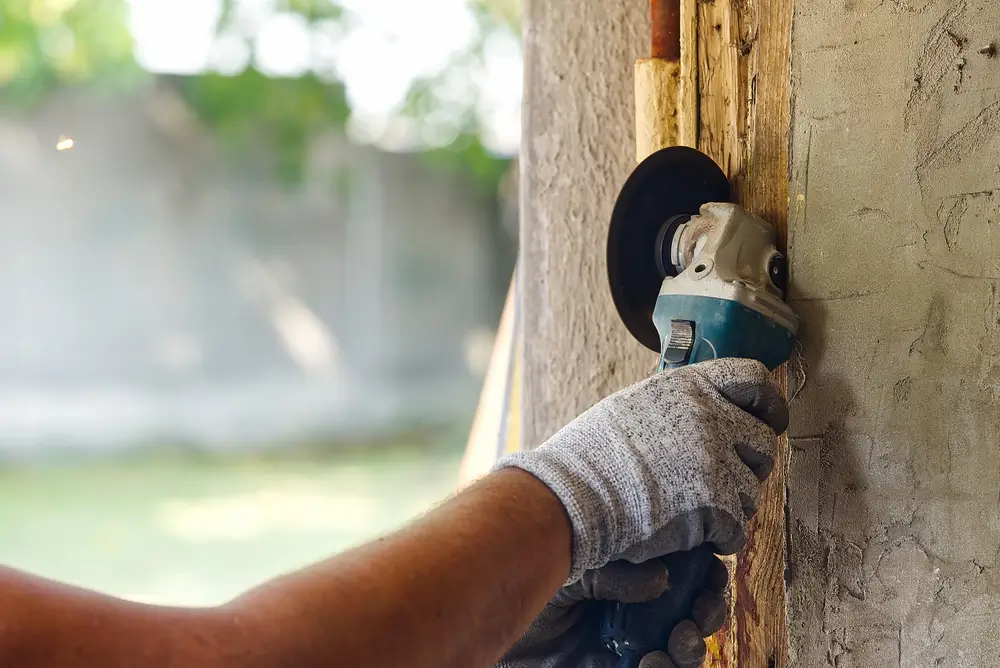
Removal and Treatment
Once you know the full extent of the damage, begin taking out all the affected wood. Remove every crumbly or brittle piece until only solid, healthy wood remains. Wood that gives way under a screwdriver needs to be replaced. After clearing out the rot, apply a quality fungicide to any surfaces that were nearby. Sterilize brick or concrete in contact with the damaged area, because dry rot spores can linger there. For more detail on these steps and to see photos, visit how to identify dry rot signs and treatment.
Replacement and Prevention
After treatment, rebuild using pressure-treated or naturally rot-resistant wood. If you are fixing a deck or porch, install flashing or vapor barriers to keep moisture out. For larger repairs, make sure any structural pieces are supported while you work. Don’t just repair the wood – address the original moisture problem, such as leaks, poor drainage, or bad ventilation. Taking care of these issues now helps prevent dry rot from returning. Simple steps like sealing gaps or improving airflow can make a big difference in the long run.
Repair or Replace Damaged Wood
Dry rot repair isn’t the same for every situation. Sometimes, when damage is caught early and limited to a small area, you can repair the spot with epoxy. For example, if only the corner of a deck board or a section of fascia is affected, a two-part epoxy filler can rebuild the area. Once cured, the spot is sanded and sealed. This method works when the rot is shallow and the wood underneath still feels solid after testing with a screwdriver.
If you push into the wood and it breaks apart, or if rot has spread into key supports like beams, joists, or posts, the only safe option is replacement. Patch repairs can’t fix wood that’s already lost its strength.
Here’s how this plays out in real life. A homeowner in Roseville noticed a soft spot near the deck stairs. After a quick check, it turned out only one tread was damaged. We fixed it with epoxy and the deck was safe again. Another time, a deck looked fine on top, but a leak had let dry rot spread through the ledger and support beams. That job needed a full section replaced to restore safety.
If you’re not sure how serious the damage is, play it safe and check out Roseville exterior wood rot repair for a professional assessment. And remember, when replacing structural wood, support the deck first so nothing shifts or collapses during repairs. It’s a simple step that can prevent bigger problems.
Prevention for the Future
Keeping dry rot away starts with a simple rule: stop moisture from reaching your wood. Even a small leak or patch of trapped air can give fungus the chance it needs. Decks, fences, and porches all face the same risk if water is left unchecked. Regular upkeep is much easier than dealing with damage later.
Start by fixing anything that lets water collect near wood. Check gutters and downspouts to make sure they send water far from your house. Adjust sprinklers so they never spray posts or siding. Make sure crawlspaces and the area under decks have good airflow, since fungus grows fastest in damp, still air. Pay attention to hidden trouble spots like the flashing around windows and doors, and always direct drainage away from your foundation. Keep wood from touching soil or concrete, as these surfaces hold onto moisture and can rot posts from below.
- Repair leaks and improve drainage to keep wood dry.
- Ventilate crawlspaces, basements, and areas under decks.
- Install flashing around windows, doors, and deck connections.
- Inspect wood surfaces every few months, using a screwdriver to check for softness.
- Keep wood elevated and away from soil or brick with proper post bases.
Dry rot can spread quietly and quickly. These small steps – cleaning gutters, improving airflow, and checking for trouble – make a big difference. By staying alert now, you protect your home and avoid expensive repairs down the road.
Choosing Rot-Resistant Materials
If you want to keep dry rot out of your deck or fence, your choice of materials is a big deal. Some woods naturally resist rot better than others. Redwood and cedar are classic picks. Their heartwood contains oils and compounds that help block out moisture and pests. Redwood, especially from the center, can last for decades without much trouble. Cedar holds up, too, but it’s softer and can dent more easily. These options usually cost more at the start, but they often save you money over time because you won’t need to replace boards as often.
Pressure-treated lumber is common, but it comes with a warning. The treatment doesn’t reach the core of the board. If you cut it or drill into it, those fresh surfaces aren’t well protected. Moisture can sneak in through those spots and start rot from the inside. That’s why it’s important to seal any exposed ends or cuts.
Composite decking is another choice. It’s made from a mix of wood fibers and plastic, so it won’t rot or attract termites. Maintenance is simple – no need for staining or sealing. However, composites can get hot in the sun, and some stains may be tough to remove. Every material has pros and cons. If you’re unsure which one fits your project, or you need help with repairs, you can reach out for deck repair from local pros who’ve seen it all. The right materials can make a big difference in how long your deck or fence lasts.