
How to Seal a Wood Fence
If you’ve ever watched your fence turn from fresh and golden to gray and tired, you’re not alone. All over Sacramento, fences fade and wear out long before they should. There’s a simple fix that can make any wood fence look years younger: sealing. While a good-looking yard is always nice, sealing does more than improve the view. It helps your fence stand up to everything from hot summer sun to chilly winter rains.
After working on fences, decks, and backyard projects for 15 years, I’ve seen what happens when wood is left open to the elements. Rain and dew soak in. Sunlight dries and weakens the boards. Over time, wood starts to crack, warp, and turn gray. Sealing stops moisture from getting in and blocks UV rays that break down the wood. The result? Your fence stays strong and keeps its color. I’ve seen well-sealed fences hold up for a decade or more with only basic upkeep. If you want to avoid a fence full of splinters or posts that start to lean, sealing is the first step.
Sealing isn’t complicated, but it does require a little planning. Some people enjoy tackling the project themselves and saving a bit of cash. Others prefer to hire someone and skip the mess. Either way works. Your choice depends on your comfort level, your available time, and whether you’re okay with a little hands-on work. The main thing is to stay ahead with regular care. A little effort now can save you from expensive repairs later. In this article, we’ll cover when to seal, the best products to use, how to prepare, and step-by-step tips for getting it done right. By the end, you’ll know exactly how to keep your fence looking great for years to come – no matter who does the work.
When and How Often to Seal a Wood Fence
Timing makes a big difference in wood fence care. Sealing too early or waiting too long can both cause problems later. For a new fence, don’t rush. Fresh lumber usually needs several weeks to two months to fully dry out before you apply any sealer. If you seal too soon, the product may not stick and could peel off quickly. I learned this firsthand years ago. Patience really is key here.
For fences that have been standing for a while, check the surface before deciding to reseal. An easy test is to sprinkle a little water on the wood. If it soaks in and the wood darkens, the old protection has worn off and you should reseal. If water forms beads on the surface, your fence is still protected. Pressure-treated wood is a bit different. It’s built to handle decay, but sealing still helps. Just make sure it’s completely dry, which sometimes takes six months or longer, so moisture doesn’t get trapped under the sealer.
Regular care keeps your fence from turning into a bigger project with costly repairs. Most fences need sealing every two to three years, but strong sun or heavy rainfall might mean you need to do it more often. Staying on schedule saves money and helps your fence last longer. A little attention now keeps your fence looking great and avoids bigger headaches later.
Choosing the Best Sealer and Finish
Choosing the right sealer for your wood fence can feel overwhelming, but it doesn’t have to be. Each type of sealer offers different results, and knowing what to expect makes your decision much easier. After years of treating fences in Sacramento’s tough climate, I’ve seen how the right product can keep a fence looking great and standing strong. On the other hand, the wrong choice can lead to fading, stains, or peeling.
Clear sealers are a favorite for anyone who wants to keep the natural look of their wood. They protect against sun and rain, but won’t add color. If you want a hint of color without hiding the wood grain, semi-transparent stains are a good pick. They let some of the wood show through and offer more shade choices. Solid stains, on the other hand, cover the wood almost like paint. They’re useful for older fences or when you want to hide repairs. Paint with built-in sealer covers everything and gives bold color, but you lose the wood’s texture. You’ll also need to decide between oil-based and water-based products. Oil-based sealers soak in well, last longer, and handle heat, but take more time to dry and need extra effort during cleanup. Water-based sealers are easier to use, dry fast, and clean up with just soap and water, but they don’t last as long in harsh weather.
Product Comparison Guide
| Type | Benefits | Drawbacks | Best For |
|---|---|---|---|
| Clear Sealer (Oil or Water) | Natural look, simple use, shields against UV | No color, needs reapplying every 1-2 years | New or good-looking wood like cedar or redwood |
| Semi-Transparent Stain | Shows wood grain, adds color, decent weather protection | Color can fade, brings out any wood flaws | Fences in fair shape where grain is still visible |
| Solid Stain | Covers flaws, strong defense, many color options | Hides grain, thicker finish | Older fences or those exposed to tough weather |
| Paint + Sealer Combo | Bold color, full coverage, protects and colors at once | No visible wood, can peel over time | Worn, patched, or mismatched fences |
If you have a newer fence made from cedar or redwood, clear or semi-transparent sealers are usually the way to go. For older fences or wood with a lot of repairs, solid stains or paint/sealer combos help hide spots and make things look fresh fast. I prefer oil-based products for long-lasting results, especially in areas with lots of sun. For quick projects or easy cleanup, water-based is a solid choice. Take a good look at your fence, decide how much of the wood’s look you want to keep, and think about how much work you’re willing to do for upkeep. The best sealer is the one that fits your needs and keeps your fence looking its best.
What You Need to Get Started
Before you begin sealing your wood fence, make sure you have all the supplies on hand. Trying to hunt down a missing brush or running out of cleaner halfway through is frustrating and slows down the whole process. Gathering your gear ahead of time lets you focus, work faster, and avoid unnecessary distractions.
- Cleaning Supplies: Use a stiff-bristle brush, a garden hose or pressure washer, and a deck cleaner or wood brightener. For tough stains on older fences, oxalic acid can help lift deep discoloration.
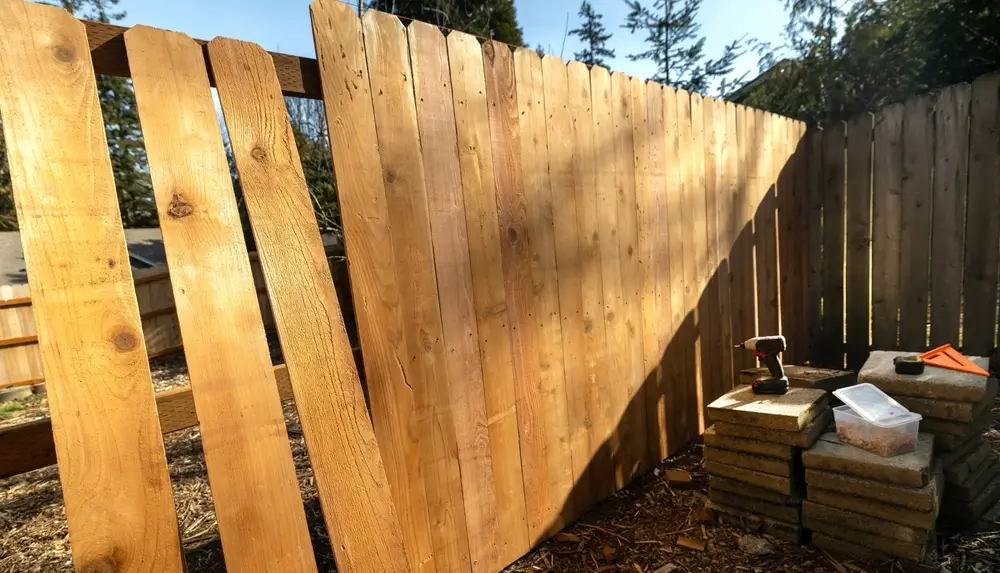
- Repair Tools: Bring a hammer, nails or screws, wood filler, a putty knife, and a cordless drill. Patching holes and securing loose boards is important before you seal.
- Application Equipment: Choose between a brush, roller, or sprayer. Pump sprayers cover large areas quickly, while brushes are helpful for corners and detail work.
- Safety Gear: Gloves, safety glasses, a dust mask, and old clothes protect you from splashes and fumes. Some sealers have a strong odor, so don’t skip these items.
Quick Checklist:
– Stiff brush & cleaning solution
– Pressure washer or hose
– Hammer, nails, drill, wood filler
– Brush, roller, or sprayer
– Gloves, safety glasses, mask, old clothes
Set yourself up for success by organizing your supplies before you start. Careful planning leads to better, longer-lasting results and saves you a lot of hassle down the line.
Getting Your Fence Ready
Preparing your wood fence before sealing is key if you want lasting results. Skipping these steps leads to a finish that peels, flakes, or fades fast. I’ve seen plenty of fences in Sacramento turn shabby within a year because someone sealed over dirty, damp boards. Cutting corners here will cost you extra time and money down the line.
Begin by inspecting your fence. Walk along it and look for loose nails, cracked boards, or any pickets that move. Fix or replace anything damaged. Afterward, trim back any plants, vines, or grass that touch the fence. Plants can trap moisture and make the sealer go on unevenly. Leaving green streaks under the sealer is a common beginner’s mistake.
Cleaning comes next. Use a deck brush and wood cleaner for light dirt. For fences with heavy grime, algae, or old stain, a pressure washer can help. Always use low pressure (below 2000 PSI) and keep the nozzle at least a foot away from the wood. This prevents gouging or leaving marks. After washing, apply a wood brightener to balance the pH. This helps the new sealer stick and gives a more even look. Let your fence dry for at least 48 hours before sealing. If you seal damp wood, the results won’t last.
If you’re building a new fence or considering a replacement, choosing quality lumber makes sealing much easier. Some wood species last longer and accept sealers better. Curious about what works best in our climate? Check out this guide on the best wood type for fencing. Good preparation isn’t flashy, but it’s what keeps your fence looking great year after year.
Sealing Like a Pro Step by Step
Sealing your wood fence can feel tricky at first, but breaking it down into small steps makes the job much simpler. A little patience and the right technique will keep your fence looking great and shield it from weather damage. You don’t need fancy tools or years of experience to get pro-level results – just follow these steps and take your time.
- Choose a good day: Pick a dry, mild day with temperatures between 50 and 80°F. Make sure rain isn’t expected for at least 24 hours. High humidity can delay drying and affect the finish.
- Prepare your tools and sealer: Stir your sealer or stain well to prevent bubbles. Set up your brush, roller, or sprayer. If using a sprayer, test the spray pattern on some cardboard and check for blockages.
- Begin at the top: Work from the top of the fence down. This way, any drips won’t mess up finished areas. Use long, steady strokes. Rollers or sprayers work best for wide sections, but keep a brush ready for edges and tight spots.
- Watch for overlaps: Work on 3 or 4 boards at a time. Blend into the wet edge as you go to avoid lap marks. Apply thin coats – two light coats are better than one heavy layer.
- Let it dry fully: Follow the drying times on your product label. Water-based sealers usually dry in 2 to 4 hours. Oil-based types can take 4 to 24 hours. Don’t rush the process or touch the surface before it’s ready.
- Add a second coat if needed: Older or dry wood may need another coat for full protection. Apply the second coat only after the first is completely dry.
If this is your first time sealing, start in a less noticeable spot. This gives you a chance to get comfortable with your tools and technique before working on the most visible parts of the fence.
Tip: Keep a rag nearby to catch drips or wipe up spills right away. Cleaning up as you go makes a big difference and saves you from extra sanding later.
Using a Sprayer for Faster Results
Looking at a long wood fence and a paintbrush can feel overwhelming. Years ago, I tried rolling stain onto a 60-foot fence. By the end of the day, my arms were exhausted and I still hadn’t finished. That’s when I realized how useful a sprayer could be. A sprayer makes the job much faster and helps you get consistent coverage, even on rough or uneven boards.
Before you start, choose your sprayer carefully. For most fences, an airless sprayer works best for covering large areas quickly. If you want more control and less mess, a high-volume, low-pressure (HVLP) sprayer is a good option. Always set up your spray pattern before working on the fence. Most people use a wide, vertical fan pattern for panels. Test the pattern on a spare board or cardboard. Work one panel at a time, moving steadily and overlapping each pass slightly. Hold the sprayer about 12 inches from the wood. Keep your hand moving to avoid drips or thick spots. Be sure to check the weather. Windy days can blow sealant everywhere except your fence. Keep a brush nearby for spots the sprayer misses or for tight corners.
Once, a friend in Folsom had a backyard fence that seemed like it would take all weekend to seal by hand. With a sprayer and a little prep, we finished in under three hours. We even had time left for barbecue. Using a sprayer saves time, but don’t rush. Skipping cleaning or not letting the wood dry can ruin the results. Spraying too much product at once can also cause problems. If you take the time to do each step right, the sprayer will reward you with a fence that looks great and lasts longer.
How to Avoid Costly Mistakes
Few things are more frustrating than realizing your hard work on a fence didn’t pay off because of a simple oversight. After years of helping homeowners with fence repairs around Sacramento, I’ve seen some common errors that can lead to wasted time and money. Luckily, knowing what to watch for can help you finish the job right and avoid headaches down the road.
- Skipping preparation: Failing to clean, repair, or let the wood dry before sealing almost always causes problems later.
- Sealing damp or dirty wood: Trapped moisture or dirt under the sealant can cause peeling, discoloration, or even mold growth.
- Applying too much sealer: Using too much at once leads to drips, sticky spots, and a finish that never dries properly.
- Not testing your product first: Every type of wood reacts differently. Test a small, hidden spot before you cover the entire fence.
- Ignoring the weather: Sealing just before rain, during peak sun, or on humid days often causes blotches or uneven color.
If you’re not sure about a step, go back and review the earlier sections on surface prep, drying times, and picking the right product. Being careful at each stage is worth it. Speaking from experience, a little extra effort now saves a lot of frustration later.
Keeping Your Fence in Top Shape
Sealing your wood fence is just the first step to keeping it looking great. To make that protection last, regular upkeep is key. Think of your fence like an old pickup – it’ll stick around for years if you give it some attention now and then. Sun, water, and even pets can slowly wear away the sealant. That’s why a simple maintenance routine makes all the difference.
Check on your fence every spring and fall. Give it a gentle wash with a hose. Skip the pressure washer unless you see stubborn dirt or algae. Brush away cobwebs, leaves, or any debris. While you’re cleaning, keep an eye out for peeling or fading spots, or areas where the wood looks gray. These are signs the sealant is losing its strength. Usually, resealing every couple of years is enough. But if you notice water soaking in instead of beading up, it’s time to reseal sooner.
Key Reminder: “A quick fence check each spring can save you hours of repair work later. Small habits now prevent big problems down the road.”
Here’s an example of how easy this can be: Every March, Joe in Roseville gives his fence a quick rinse, checks for damage, and trims back any bushes. In the summer, he checks for faded areas and tests if water still beads on the surface. If the fence looks good, he leaves it. If not, he makes time to reseal. Before the rainy season, he does one last check. Altogether, this takes just a few hours a year, and his fence still looks great after ten years. A little effort goes a long way.
Knowing When It’s Time for a Change
Even with regular sealing and repair, every wood fence reaches a point where upkeep just isn’t enough. If you notice posts that wobble, boards that crumble to the touch, or sections that lean at odd angles, your fence may be past its prime. Signs like major rot, insect damage, large cracks, or missing boards show that quick fixes won’t solve the problem.
Replacing a board or two is fine, but when repairs keep piling up, it might cost more in time and money than a full replacement. Wood fences face all kinds of weather in Sacramento, from heavy rain to blazing sun, and that takes a toll over the years. If you’re unsure whether your fence can be saved, it’s wise to ask a local pro for an honest assessment.
Many homeowners in the area have found it helpful to get advice after years of trying to keep their fences standing. If you live near Granite Bay, you can look into fence repair in Granite Bay for reliable service. Sometimes, replacing an old fence is the right call for both your property and your peace of mind.